Generating an Internal CA Certificate
To generate an internal CA certificate for your security gateway object:
- In the General Properties window of your Security Gateway, make sure the IPSec VPN checkbox is marked.
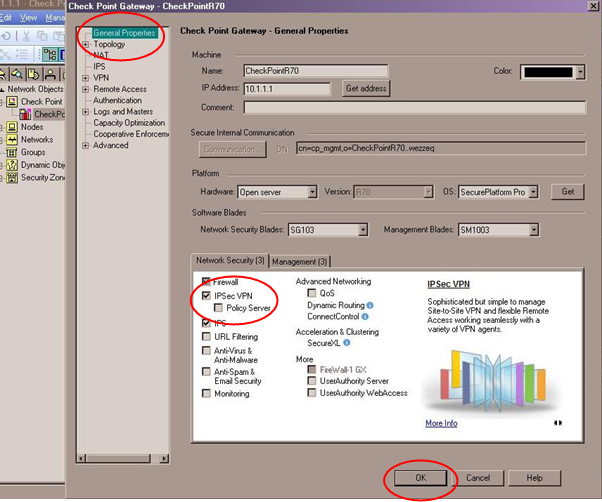
- Click OK, the following window is displayed.

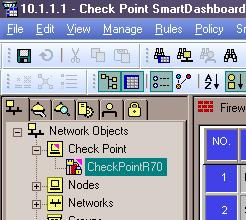
- Click OK. An internal CA certificate is created and your security gateway object should now have a key symbol on it bottom right.
Setting up the VPN
To set up the VPN:
You need to create an object to represent the peer gateway.
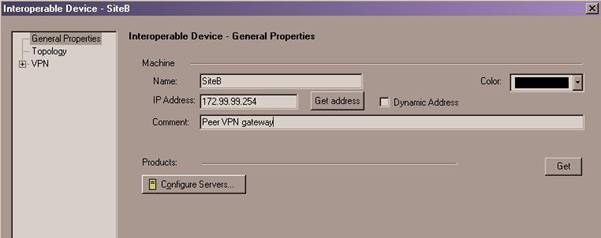
- Right click on Network Objects and select: New > Others > Interoperable Device

- Give the gateway a name, IP address, and (optional) description in the properties dialog window that is displayed.
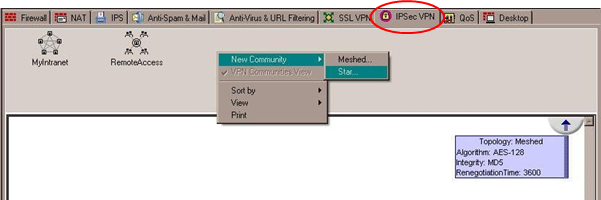
- In the IPSec VPN tab in your SmartDashboard, right click in the open area on the top panel and select: New Community > Star.
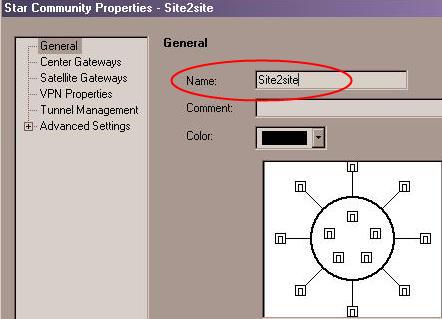
- A Star Community Properties dialog pops up. In the General menu, enter your VPN community a name:
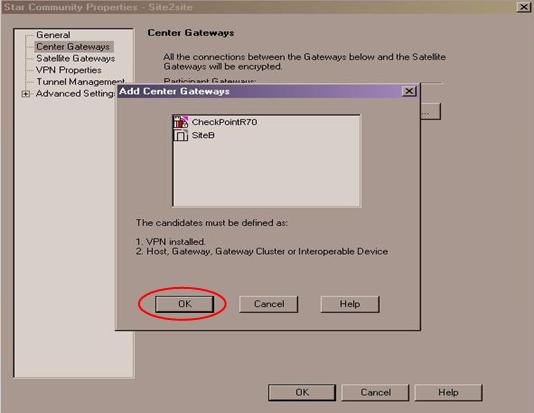
- In the Center Gateways menu, click: Add, select your local Check Point gateway object, and click OK.
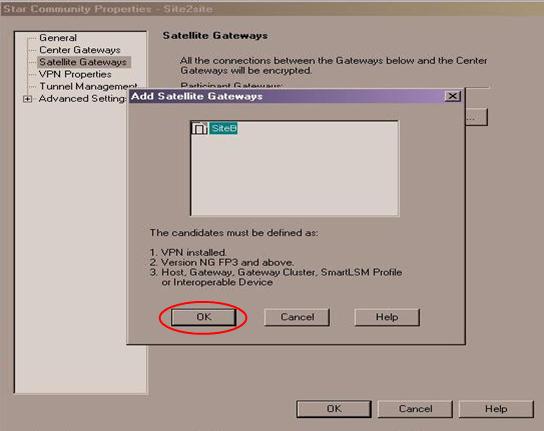
- In the Satellite Gateways menu, click: Add, select the peer gateway object, and click OK.
- In the VPN Properties menu, you can change the Phase 1 and Phase 2 properties.
 Note - Make a note of the values you select in order to set the peer to match them.
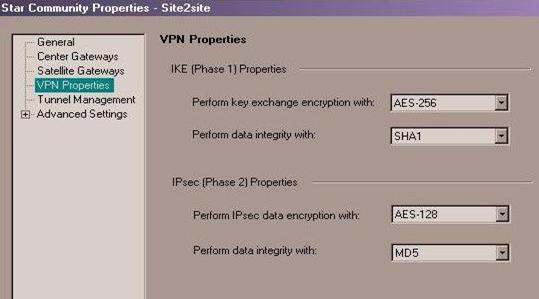
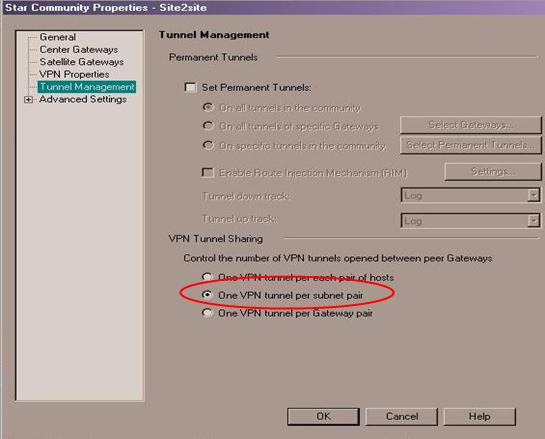
- In the Tunnel Management menu you can define how to setup the tunnel. Note - The recommended tunnel sharing method is: One VPN tunnel per subnet pair.
This will share your network on either side of the VPN, and makes the Phase 2 negotiation smooth, and requires fewer tunnels to be built for the VPN.If you need to restrict access over the VPN, you can do that later through your security rulebase.
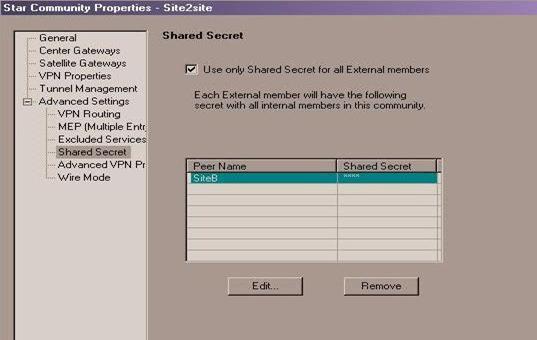
- Expand the Advanced Settings menu and select: Shared Secret. Mark the Use only Shared Secret for all External members checkbox. Select your peer gateway from the entries in the list below and click Edit to edit the shared secret. Note - Remember this secret, as your peer will need it to set up the VPN on the other end.
- Expand the Advanced Settings menu and select: Advanced VPN Properties. Here, you can modify the more advanced settings regarding Phase 1 and 2. Note - Keep note of the values used. It is also a good idea to select:
Disable NAT inside the VPN community so you can access resources behind your peer gateway using their real IP addresses, and vice versa.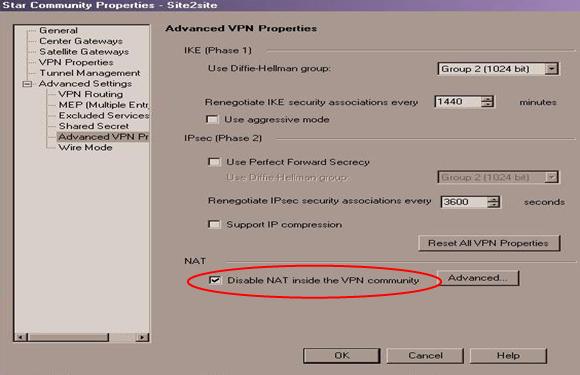
- Click OK on the VPN community properties dialog to exit back to the SmartDashboard. You may see the following message:
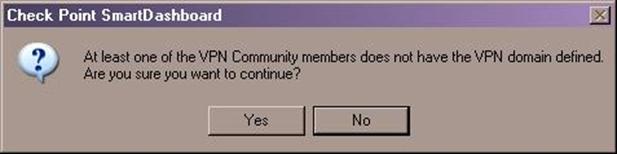
- We are about to address the VPN domain setup in the next section, so click Yes to continue.
Now you can see your VPN community defined: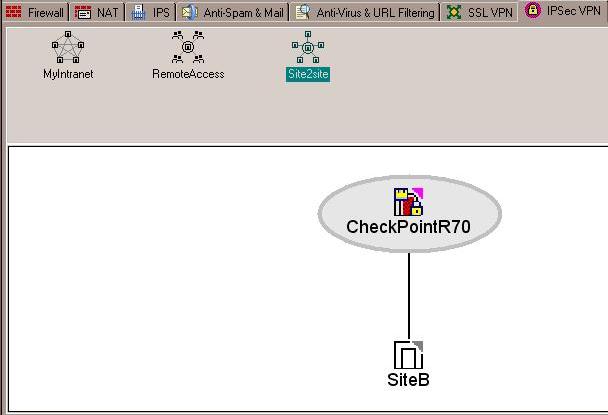
Defining VPN Domains
You now need to define your VPN domains.
If you have not already done so, create network objects to represent your local networks and the peer networks they will be sharing with you.
To define VPN domains:
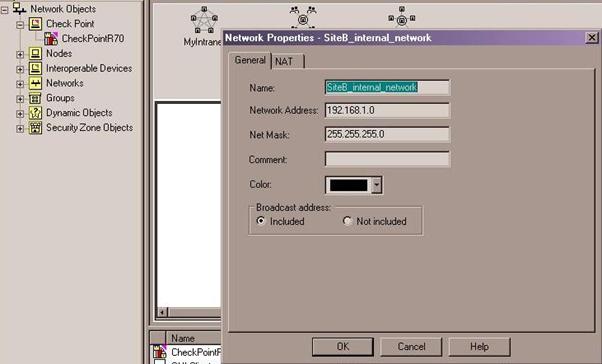
- From the Network Objects menu, right click on Networks and select Network to define a new network. In the following image, we are creating a network to represent our peer's internal network that they will be sharing with us:
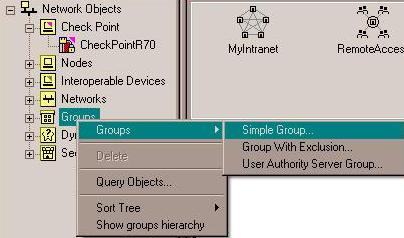
- If you or your peer is sharing more than one network over the tunnel, create groups to represent each side's VPN domain. From the Network Objects menu, right click on Groups, select Groups and then Simple Group...
In this example, we are only sharing one network, so the group will only have one object included, but you can put as many networks in this group as you would like to share. It is important not to add groups within a group as this can impact performance. Make sure the group is "flat". Give your group a meaningful name such as: Local_VPN_Domain. Click OK once you have added all of your local networks and then repeat the procedure to create a group to represent your peer's shared networks.

Now you need to set the VPN domains for each of the gateways.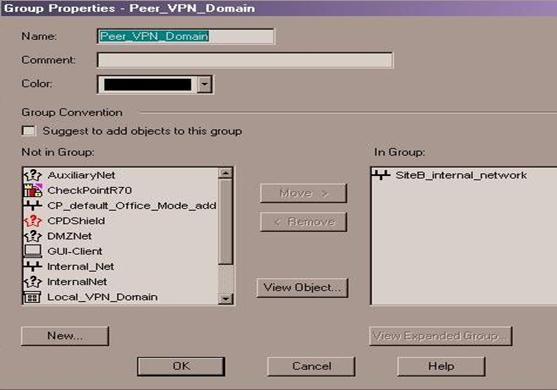
- Open the properties for your local Check Point gateway object. Select the Topology menu. In the VPN Domain section, select Manually defined, and from the drop-down list, select your Local VPN domain group object.
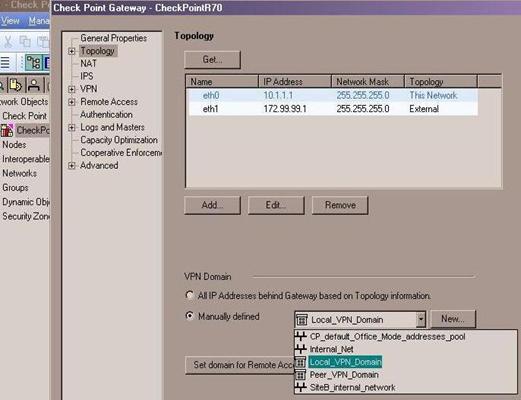
- Click OK to save the object.
- Open the properties for the peer gateway and select the group/network that represents its VPN domain:
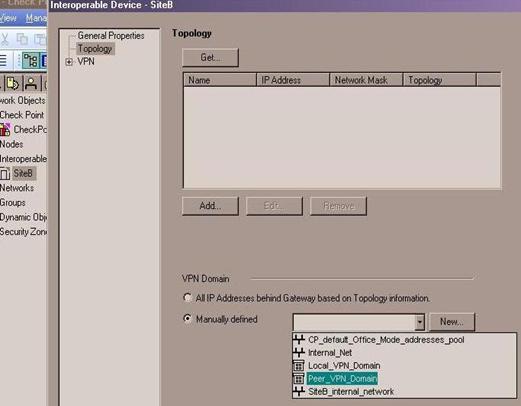
- Click OK to complete the peer gateway configuration.
Creating a Rule for the Traffic
Now, you have both objects setup for VPN and you have defined your community. All that is left is to create a rule for the traffic.
Here is where you should restrict access if it is required.
To create a rule for the traffic:
- Decide where in your rule base you need to add your VPN access rule and right click the number on the rule just above where you want it and select: Add Rule --> Below.
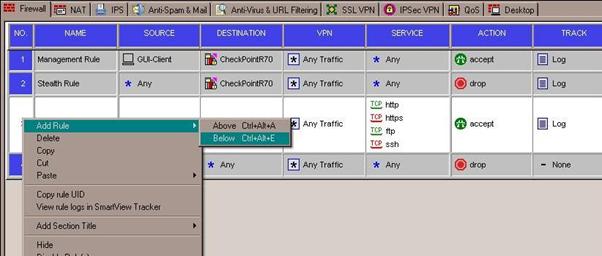
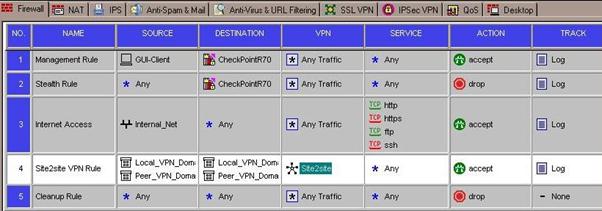
In this example, we are allowing any service across the tunnel in both directions.
You should also explicitly set the VPN community in the VPN column on your rule.
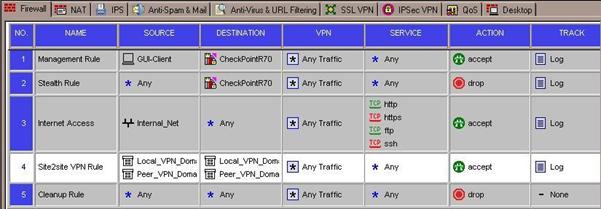
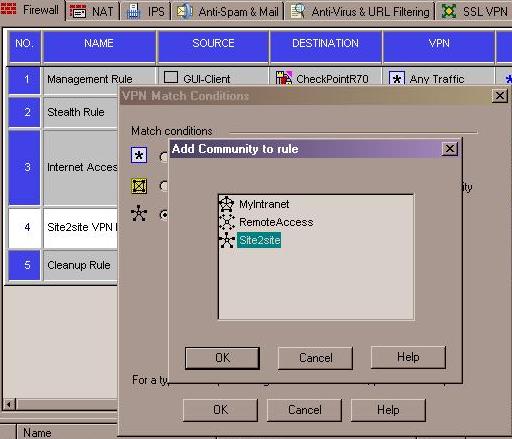
- In the VPN column, right click the Any Traffic icon and select: Edit Cell.... Select the: Only connections encrypted in specific VPN Communities option button and click Add. Select the VPN community created in the above steps and click OK and then OK again.
Your rule should now show the VPN community in the VPN column.
Completing the Procedure
Install the policy to your local Check Point gateway. The VPN is setup!
Verifying the Procedure
Once the remote side has setup their VPN to match, verify that you have secure communication with their site.
Post a Comment